
A bottle that tips on a filling line is not automatically a bottle-design failure. It can fall because the base loses contact, the filled center of gravity moves outside its support area, a guide rail steers the shoulder, a starwheel pocket releases it at the wrong moment, or the transfer adds a side impact. The quickest diagnosis begins with a short high-speed video and one question: does the bottle fall on a straight conveyor, at a rail change, at an infeed screw, or during starwheel transfer?
Separate the problem by package condition before changing a mold or slowing the whole line. Run and label empty bottles, production-filled bottles, bottles at the actual process temperature, and the same format with its final closure. A bottle can be stable when empty yet become unstable after fill because liquid movement, a heavier cap, warm-wall stiffness or a different center of gravity changes the way it responds to acceleration.
This guide addresses lateral stability and transfer behavior. It complements, rather than replaces, top-load testing at the capper or hot-fill deformation review after cooling. The aim is to identify the first event that starts the fall, then change the smallest relevant part of the bottle-line system.
| Where the Fall Starts | Most Likely First Question | Evidence to Capture Before Adjustment |
|---|---|---|
| Straight conveyor | Is the base fully contacting the belt and is the bottle tracking straight? | Base rocking check, belt speed, bottle pitch, rail gap and slow-motion video |
| Rail entry or rail change | Does one rail touch the shoulder or neck before the other rail is supporting the body? | Rail height, parallelism, transition geometry and witness marks |
| Infeed screw or timing transfer | Is bottle pitch or handoff speed creating a side impact? | Screw pitch, conveyor speed, transfer timing and bottle-to-bottle contact |
| Starwheel entry or exit | Does the pocket locate the bottle at the support diameter without pinching or excessive clearance? | Pocket profile, radial clearance, guide support and transfer video |
Check the Base Contact Area Before Using a Height-to-Diameter Rule
Height and base diameter are useful screening dimensions, but there is no universal height-to-diameter ratio that proves a condiment bottle will tip. The practical stability envelope also changes with bottle mass, fill level, base geometry, belt acceleration, line speed, guide-rail contact and the way the bottle enters the next machine. Treat a ratio as a comparison between candidate bottles, not as a pass-or-fail specification.
Inspect the standing ring or other intended contact surface on a flat reference plate. A bottle that rocks before it reaches the line may have an uneven base, flash, a distorted heel or a contact ring that is too narrow for the load it sees. For a filled bottle, check again after the actual fill and cooling sequence. Record base rocking, contact-ring diameter, base flatness and the direction of the first lean rather than relying on a visual judgment alone.
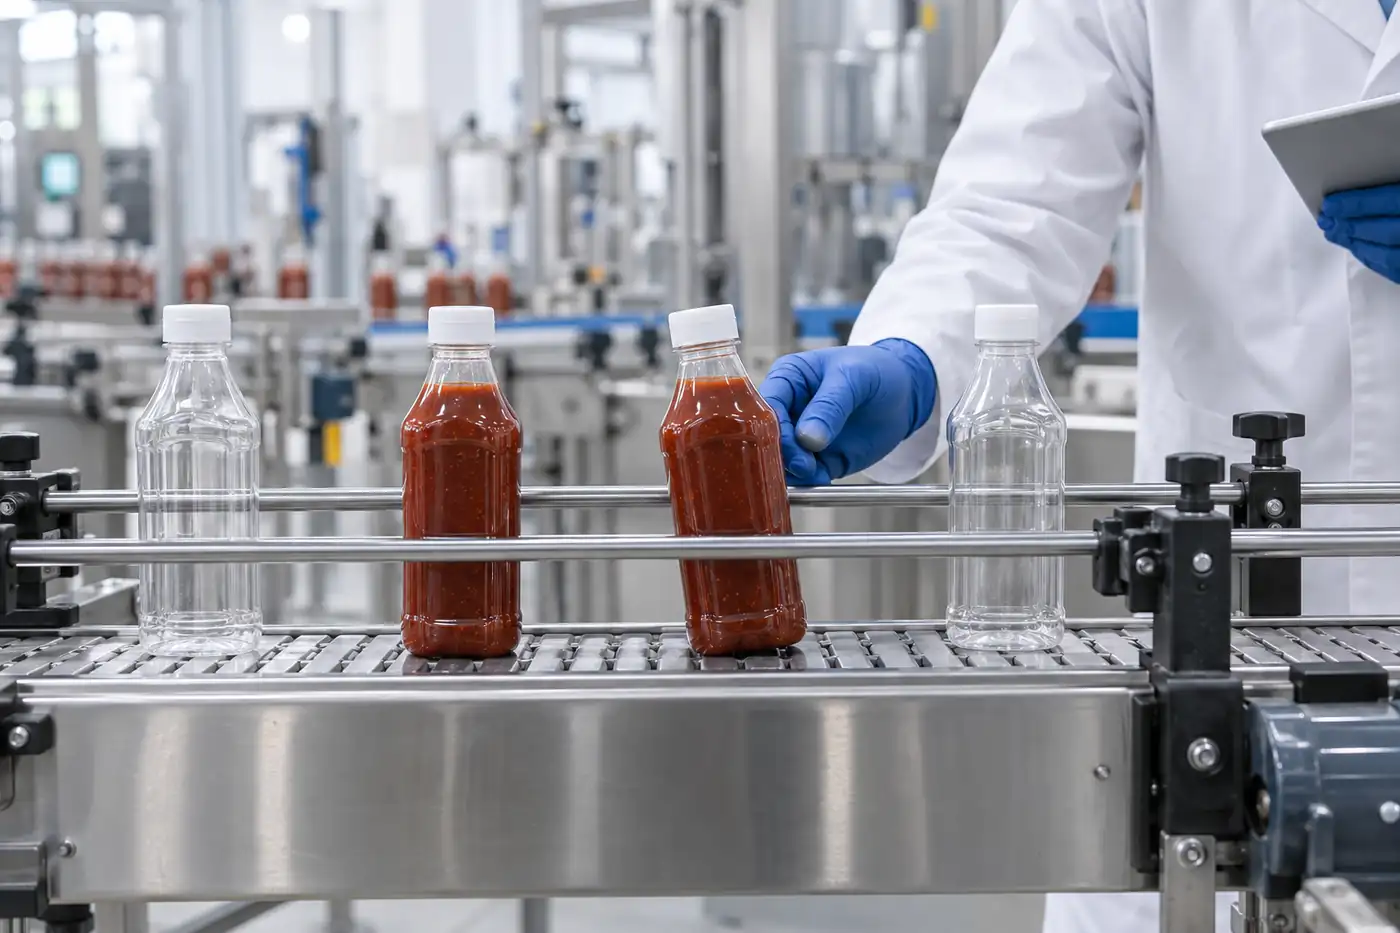
For clear condiment squeeze bottles, a controlled base and a repeatable lower-body shape help the line team separate a true geometry issue from a rail or timing issue. If the product requires a new silhouette, evaluate base diameter, standing-ring width, heel radius and label-panel layout together; widening one feature can affect carton fit, shelf presentation and mold draw.
| Base Observation | What It Can Mean | Corrective Direction to Test |
|---|---|---|
| Bottle rocks on a flat plate | Uneven standing ring, heel distortion or molded-part variation | Measure base flatness by cavity; correct the molded base before changing line settings |
| Bottle leans in one repeatable direction | Asymmetric base, body mass or rail contact | Map the lean to bottle orientation, mold cavity and the first rail-touch point |
| Bottle tips only after filling | Filled mass or liquid movement shifts the effective balance point | Measure the filled package and repeat the route at the real fill level and temperature |
| Bottle tips only at higher speed | Acceleration, transfer impact or bottle pitch exceeds the stable operating window | Record speed changes and transfer timing before changing bottle geometry |
Measure the Filled Center of Gravity, Not Just the Empty Bottle
The relevant center of gravity is the one carried through the line. A tall empty bottle may balance well, while a filled package with a heavy closure, high fill level or partly settled product becomes top-heavy. Half-filled development samples can be misleading too: liquid can surge during a speed change, shifting the instantaneous load toward one side. Confirm the intended fill mass, headspace, cap and product temperature before comparing designs.
A simple practical check is to support a filled bottle in two perpendicular directions on a low-friction balance fixture or to use a controlled tilt test with the real package. The result is not a universal acceptance angle; it is a way to compare the current bottle against a candidate base, weight or fill condition under the same method. Pair that result with video from the line, because a stable static center of gravity can still be upset by a poorly timed transfer.
Do not solve a center-of-gravity issue by adding resin everywhere. A targeted change to the lower-body support, shoulder transition, bottle weight distribution or closure selection may be more effective, while preserving the dispensing behavior required for squeeze sauce bottles for thick condiments.
Set Guide Rails at the Support Zone, Then Verify the Transitions
Guide rails should stabilize the bottle without becoming the force that overturns it. A rail set too low can let a tall bottle pivot above the contact point. A rail set too high can catch the shoulder, neck or cap skirt as the bottle moves through a curve or a width change. Start near the package's stable body zone, then confirm the exact height against the real filled bottle and the geometry of every transition, not only one straight section.
Measure rail gap, rail height, parallelism and the entry taper on both sides. A gap that is too wide allows yaw and bottle-to-bottle impact; a gap that is too tight creates drag, scuffing and local pinching. Cleanliness and material matter as well: dried product, rough rail surfaces, worn UHMW strips, static charge and an uneven belt can make one side of a bottle grab while the other side continues moving.
Use a marked sample bottle and run it slowly through the suspected section. Scuff marks, transferred residue or a repeated shoulder touch reveal where the bottle is being steered. Adjust one variable at a time and document the setting. If the bottle falls immediately after a rail adjustment, return to the last known-good setting before evaluating a mold change.
| Rail Symptom | Likely Mechanism | Measurement or Trial |
|---|---|---|
| Top leans away from one rail | Rail contact is below the bottle's stable support zone | Record contact height and test a controlled height change |
| Bottle twists before falling | Excess rail gap or unequal left/right contact | Measure both rail gaps along the route and compare bottle yaw on video |
| Bottle stops or jumps at a transition | Tight taper, rough strip, dirt or static | Inspect transition surface; clean and repeat at the same speed |
| Cap or shoulder scuffs | Rail is too high or the transition catches a changing diameter | Check the full profile through the rail-change point |
Match the Starwheel Pocket to the Bottle Support Diameter
A starwheel should locate the bottle at a diameter that controls its path without squeezing the sidewall or leaving it free to rattle. Nominal bottle diameter alone is not enough. The pocket profile, radial clearance, bottle height, guide support, transfer plate, neck handling and the exact bottle orientation all affect whether the bottle enters and exits smoothly.
Inspect the transfer as an event, not a still photograph. Use slow-motion video to see whether the bottle is struck at entry, rotates inside an oversized pocket, rubs at one edge, loses lower-body support at the exit or is released before the downstream conveyor has matched speed. A tight pocket can deform or eject a compliant bottle; a loose pocket can allow the bottle to build momentum and tip when it meets the next guide.
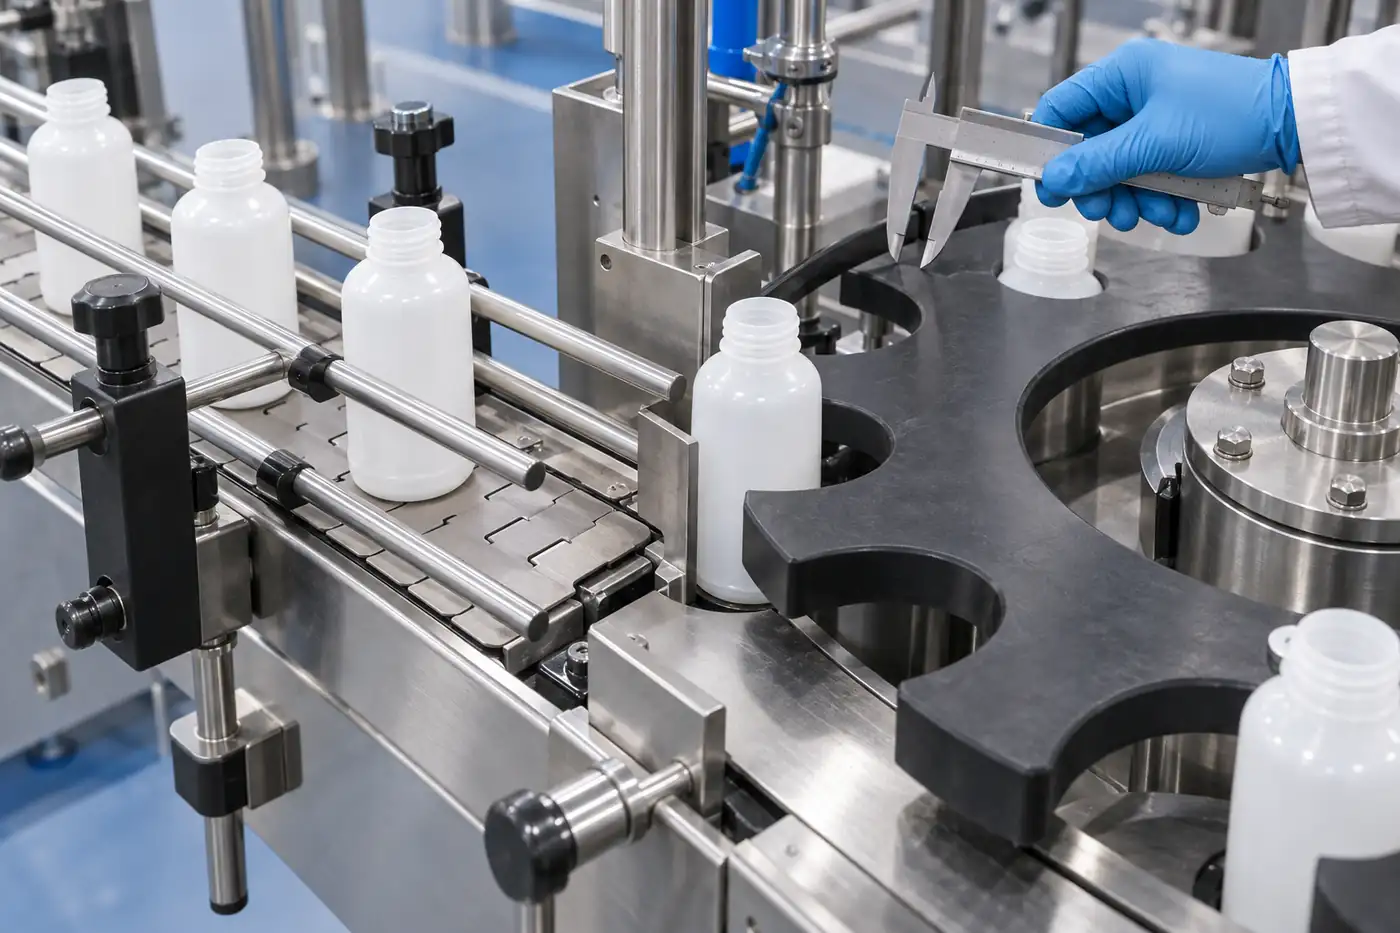
The same review is useful for bulk condiment bottles, where greater fill mass and a larger body can make small timing errors more visible. Document the actual bottle drawing, filled weight, pocket geometry, guide settings and line speeds together so the approved package can be repeated when a format or machine part changes.
| Starwheel Event | Likely Cause | Corrective Check |
|---|---|---|
| Bottle rattles in the pocket | Excess radial clearance or insufficient guide support | Compare pocket profile and support diameter with the actual molded bottle |
| Bottle is squeezed or springs outward | Pocket is too tight for the body shape or wall compliance | Check pocket radius, bottle tolerance and sidewall response with filled samples |
| Bottle falls at entry | Conveyor-to-starwheel speed mismatch or impact at the transfer point | Measure and synchronize tangential speed, pitch and handoff timing |
| Bottle falls at exit | Early release, downstream speed mismatch or missing guide support | Video the exit at production speed and extend or reposition support where needed |
Control Speed, Bottle Spacing, Friction and Static as a System
A stable bottle can still fall when the line creates an abrupt change in acceleration. Record conveyor speed, starwheel tangential speed, infeed-screw timing, bottle pitch and any ramp between machines. Then repeat the event with one controlled change. Reducing speed may hide the symptom, but the diagnostic value comes from knowing whether the fall disappears when impact, spacing or guide contact changes.
Bottle-to-bottle contact matters most near merges, accumulation and infeed. One unstable bottle can turn into a chain of falls when it touches a neighbor at the shoulder. Review accumulation pressure, back-pressure devices, belt transfers and the spacing created by the infeed screw. A clean, predictable path for a single bottle is the starting point; a stable mass-flow condition must then be proven at the intended throughput.
Friction and static should be checked as process variables, not treated as cosmetic housekeeping. A bottle that drags along one rail, catches on a worn transfer plate or attracts to a surface under dry conditions can tip even if its dimensions are correct. Note rail-strip condition, belt cleanliness, ambient conditions, product residue and any approved static-control or lubrication practice in the line log.
Use a Four-Step Line Trial Before Revising the Bottle Mold
First, confirm the failure with the actual bottle, fill condition, closure and normal line settings. Second, isolate the location with slow-motion video and measurements of base contact, guide rails, bottle pitch and starwheel transfer. Third, make a reversible machine adjustment—such as a documented rail-height, gap or timing change—and rerun enough bottles to distinguish an improvement from coincidence. Fourth, change the package only if the evidence still points to base geometry, mass distribution or body support.
If the failure appears under vertical capping force, use ASTM D2659 as a method reference for controlled column-crush comparisons, then run a line-specific confirmation. If the failure follows hot filling and cooling, review the thermal package route separately. Those conditions require different evidence from a lateral conveyor-tip event, even though the same bottle may be involved.
Gracepack can screen existing bottle and closure directions against a line brief, then define the dimensions and sample variants worth testing. The most useful brief includes a bottle drawing or reference sample, capacity, resin, gram weight, fill mass, closure, line speed, transfer layout, starwheel drawing if available, guide-rail settings, failure video and the first point at which the bottle falls.
| Trial Step | What to Freeze | Decision Output |
|---|---|---|
| Reproduce | Bottle, fill, closure, temperature and normal line setting | A confirmed failure pattern and exact location |
| Measure | Video angle, rail settings, base condition, speeds and pocket fit | Ranked root-cause hypotheses |
| Adjust | One reversible line variable at a time | A documented setting that improves or does not improve stability |
| Revise package | Only evidence-linked base, weight or support feature | A focused sample brief instead of an unfocused mold change |
When the Bottle Design Needs a Change
A package revision is justified when the same fall persists after the line settings, transfer timing and contact surfaces are within their defined windows, and the evidence points to the bottle itself. Useful design inputs include the contact-ring diameter, lower-body stiffness, base flatness, heel profile, bottle weight distribution, shoulder geometry, maximum fill level and the closure mass. The goal is not simply a wider bottle; it is a stable support geometry that still fits the filling, capping, labeling, packing and shelf requirements.
For foodservice squeeze bottles, that may mean a stronger lower support while maintaining a compliant squeeze panel. For a clear retail bottle, the change may need to protect label-panel appearance and product visibility as well as line stability. Compare an existing mold route with a focused modification before opening custom tooling, and approve the result on production-representative samples at the actual line condition.
A practical release record keeps the approved bottle drawing, critical base dimensions, fill condition, closure, rail settings, starwheel data, speed window and line-trial observations together. That record gives purchasing, quality and engineering teams something repeatable to use when a mold cavity, cap, product viscosity or line format changes.
FAQ: Bottle Tipping on Filling Lines
What causes bottles to tip on a conveyor? Common causes are uneven base contact, a filled center of gravity that is too high for the support area, poorly positioned or uneven guide rails, transfer impact, excessive bottle spacing, friction, static and starwheel pockets that are too loose or too tight. The first visible fall is not always the first cause, so video and measurements are more useful than guessing.
Should we widen the bottle base to stop tipping? A wider base can help, but only when the evidence shows the support area is the limitation. Widening the bottle can alter label space, carton count, mold draw, shelf fit and line parts. Check the guide rails, transfers, pocket fit and filled center of gravity before changing the mold.
How should guide rails be set for a tall bottle? There is no single height or gap for every bottle. Set the rails so they stabilize a durable body zone without catching the shoulder, neck or cap, then verify the complete route with the actual filled package. Record the approved settings and inspect rail transitions, not only the straight run.
Can a bottle pass top-load testing and still tip on a line? Yes. Top-load testing evaluates axial compression behavior, while a conveyor-tip event is usually lateral stability, transfer and guidance behavior. Both may be needed for a high-speed filling and capping project, but they answer different questions.
Request a Filling-Line Bottle Stability Review
Send a short video that shows the full route into and out of the failure point, plus the bottle drawing or sample, capacity, resin, bottle weight, fill level, product condition, closure, line speed, guide-rail settings and starwheel or timing-part dimensions. Gracepack can use that evidence to compare existing bottle directions, identify the measurements that matter and outline a focused sample-and-line-trial plan before custom tooling is considered.
A useful review connects the bottle, cap, filling condition and machine interfaces instead of treating them as separate purchases. The output is a practical next-test list: what to measure, what to adjust on the line first, which bottle features to compare, and what a production-representative sample must demonstrate before bulk approval.


